Adding Resources from Amazon AWS
condor_annex
condor_annex is a HTCondor tool that allows you to add cloud resources, such as Amazon Web Services (AWS), to their "pool" of resources. Please note:
- The
condor_annextool is available in the HTCondor 8.7.2 development release - Labeled as “experimental” because the interface(s) might change
- The current version has limited functionality and hence limited applicability
Use cases
- Deadlines
- Capability - large memory, GPU, long run times, fast local storage, job policies
- Capacity
connect_annex is a wrapper around condor_annex which provides some OSG Connect integration. Please use connect_annex in this tutorial.
Setting up AWS access
It is assumed at this point that you already have your AWS account setup and verified. Now it is time to create an AWS user, and provide the credentials of that users to condor_annex. Start by creating the destination files for the credentials:
$ mkdir -p ~/.condor
$ cd ~/.condor
$ touch publicKeyFile privateKeyFile
$ chmod 600 publicKeyFile privateKeyFile
The last command ensures that only you can read or write to those files.
To generate and donwload a new pair of security tokens for condor_annex to use, go to the IAM console; log in if you need to. The following instructions assume you are logged in as a user with the privilege to create new users. (The 'root' user for any account has this privilege; other accounts may as well.)
- Click the Add User button.
- Enter name in the User name box; annex-user is a fine choice.
- Click the check box labelled Programmatic access.
- Click the button labelled Next: Permissions.
- Select Attach existing policies directly.
- Type AdministratorAccess in the box labelled "Filter".
- Click the check box on the single line that will appear below (labelled AdministratorAccess)
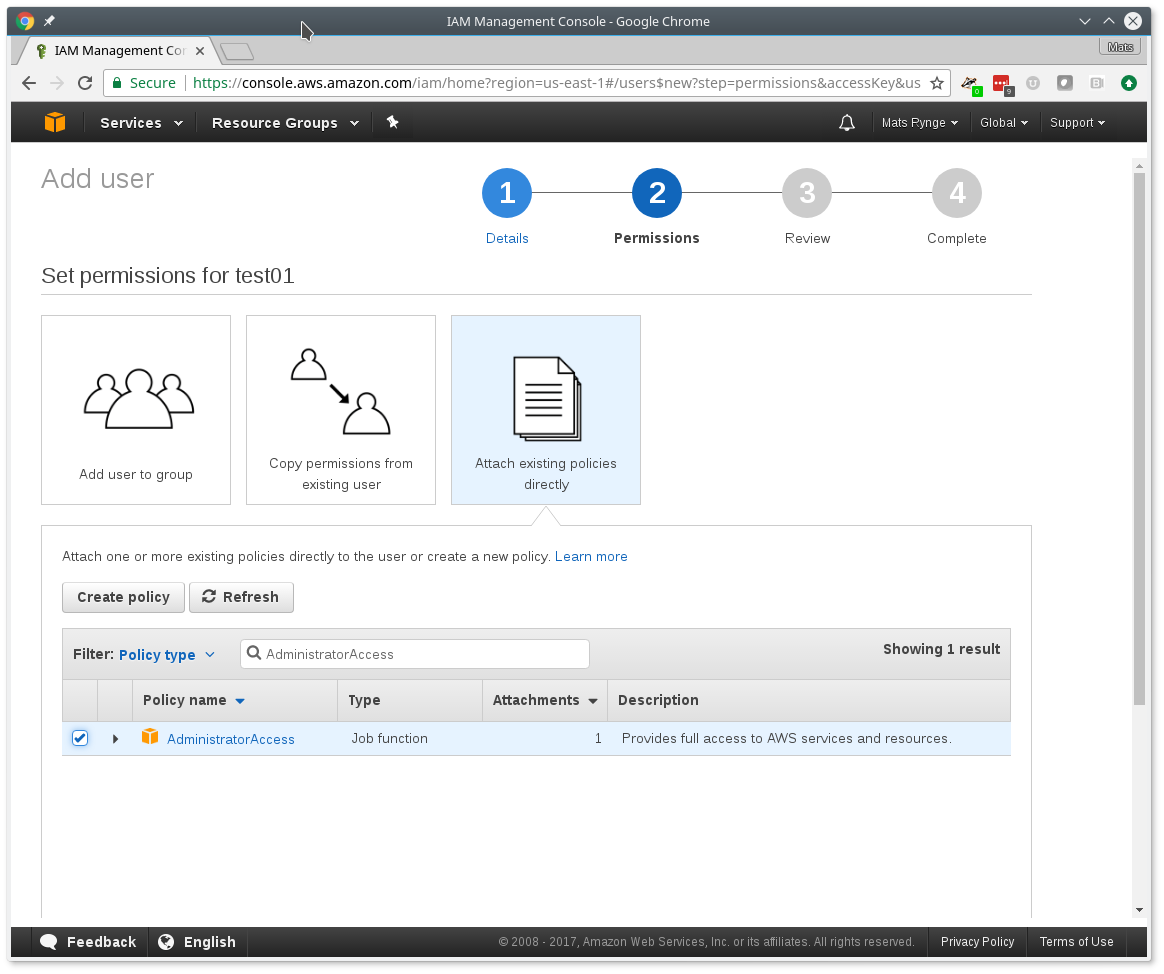
- Click the Next: review button (you may need to scroll down).
- Click the Create user button.
- From the line labelled annex-user, copy the value in the column labelled Access key ID to
publicKeyFile. - On the line labelled annex-user", click the Show link in the column labelled Secret access key; copy the revealed value to
privateKeyFile. - Hit the Close button.
The 'annex-user' now has full privileges to your account. We're working on creating a CloudFormation template that will create a user with only the privileges condor_annex actually needs.
Running the Setup Command
The following command will setup your AWS account. It will create a number of persistent components, none of which will cost you anything to keep around. These components can take quite some time to create; condor_annex checks each for completion every ten seconds and prints an additional dot (past the first three) when it does so, to let you know that everything's still working.
$ connect_annex -setup
Creating configuration bucket (this takes less than a minute)....... complete.
Creating Lambda functions (this takes about a minute)........ complete.
Creating instance profile (this takes about two minutes)................... complete.
Creating security group (this takes less than a minute)..... complete.
Setup successful.
Verifying the Setup
You can verify at this point (or any later time) that the setup procedure completed successfully by running the following command.
$ connect_annex -check-setup
Checking for configuration bucket... OK.
Checking for Lambda functions... OK.
Checking for instance profile... OK.
Checking for security group... OK.
Your setup looks OK.
Our first annex
$ connect_annex -count 1 \
                -annex-name MyFirstAnnex$USER \
                -duration 0.83 \
                -idle 0.25 \
                -aws-on-demand-ami-id ami-a2a795b4
This should start the process of bringing one VM up. Duration, which is the max lifetime of the VM, is set to 50 minutes. This lifetime is intended to help you conserve money by preventing the annex instances from accidentally running forever. Idle is set to 15 minutes, which is the amount of time the VM can sit without any jobs running before terminating.
The specified image (AMI), is a pre-defined OSG Connect image, containing a basic OSG software stack. You can make custom images if you want to.
After a few minutes, we should be able to see the new resource show up in or HTCondor pool:
$ condor_status -annex MyFirstAnnex$USER
Running jobs exclusively on AWS instances
Download the annex tutorial:
$ tutorial annex
$ cd tutorial-annex
Inside the tutorial directory you will find a sample executable:
#!/bin/bash
# short.sh: a short discovery job
printf "Start time: "; /bin/date
printf "Job is running on node: "; /bin/hostname
printf "Job running as user: "; /usr/bin/id
printf "Job is running in directory: "; /bin/pwd
echo
echo "Working hard..."
sleep 20
echo "Science complete!"
The first job we will look at is aws-exclusive.submit. Pay special attention to the Requirements and the +MayUseAWS attributes. The former locks the job to only run on AWS resources by matching part of the hostname, and the latter tells annex VMs that this job has been white-listed to run on AWS.
Universe = vanilla

# Job requirements (OS, cores, memory, ...)
#Requirements = OSGVO_OS_STRING == "RHEL 6" && Arch == "X86_64" &&  HAS_MODULES == True
Requirements = regexp("ec2.internal", Machine)
request_cpus = 1
request_memory = 1 GB
request_disk = 1 GB

# By default, AWS resources only runs jobs flagged that they are
# allowed to run on AWS
+MayUseAWS = True

# EXECUTABLE is the program your job will run It's often useful
# to create a shell script to "wrap" your actual work.
Executable = short.sh
Arguments =

# ERROR and OUTPUT are the error and output channels from your job
# that HTCondor returns from the remote host.
Error = job.$(Cluster).$(Process).error
Output = job.$(Cluster).$(Process).output

# The LOG file is where HTCondor places information about your
# job's status, success, and resource consumption.
Log = job.log

# Send the job to Held state on failure.
on_exit_hold = (ExitBySignal == True) || (ExitCode != 0)

# Periodically retry the jobs every 1 hour, up to a maximum of 5 retries.
periodic_release =  (NumJobStarts < 5) && ((CurrentTime - EnteredCurrentStatus) > 60*60)

# QUEUE is the "start button" - it launches any jobs that have been
# specified thus far.
Queue 1
Submit the job using condor_submit:
$ condor_submit aws-exclusive.submit
Submitting job(s).
1 job(s) submitted to cluster 823.
Use your newly aquired condor_q skills to make sure the job runs and finishes.
Then check the .out file. You should see something like:
Start time: Fri Jun 30 20:59:26 UTC 2017
Job is running on node: ip-172-31-27-108.ec2.internal
Job running as user: uid=99(nobody) gid=99(nobody) groups=99(nobody)
Job is running in directory: /scratch/condor/encrypted0/dir_2313

Working hard...
Science complete!
Notice how the job directory is encrypted. This is a nice new feature in HTCondor which makes sense on cloud resources. From the HTCondor 8.7 manual
ENCRYPT_EXECUTE_DIRECTORY
A boolean value that, when True, causes the execute directory for jobs on Linux or Windows platforms to be encrypted. Defaults to False. Note that even if False, the user can require encryption of the execute directory on a per-job basis by setting encrypt_execute_directory to True in the job submit description file. Enabling this functionality requires that the HTCondor service is run as user root on Linux platforms, or as a system service on Windows platforms. On Linux platforms, the encryption method is ecryptfs, and therefore requires an installation of the ecryptfs-utils package. On Windows platforms, the encryption method is the EFS (Encrypted File System) feature of NTFS.
Jobs across OSG and AWS
If we want to run job on both OSG and AWS at the same time, we just need to adjust
the job requirements. Take a look at aws-and-osg.submit. The requirements
section is:
# Job requirements (OS, cores, memory, ...)
# When running on both AWS and OSG, make sure you have a requirements
# line matching both resources. If you are using the supplied AMI,
# OSGVO_OS_STRING == "RHEL 6" && Arch == "X86_64" should be sufficient,
# or you can just always match on AWS resources separately.
# Examples:
#
#    OSGVO_OS_STRING == "RHEL 6" && Arch == "X86_64"
#
#    regexp("ec2.internal", Machine) || (OSGVO_OS_STRING == "RHEL 6" && Arch == "X86_64")
#
Requirements = regexp("ec2.internal", Machine) || (OSGVO_OS_STRING == "RHEL 6" && Arch == "X86_64")
Make sure you still have at least one annex host active, and then submit the aws-and-osg.submit jobs.
$ condor_submit aws-and-osg.submit
Where did jobs run?
When we start submitting many simultaneous jobs into the queue, it might be worth looking at where they run. To get that information, we'll use the condor_history command from quickstart tutorial.Change the job id (942) to the job id provided by the condor_submit command:
$ condor_history -format '%s\n' LastRemoteHost 942 | cut -d@ -f2 | cut -d. -f2,3 | distribution --height=100
Val          |Ct (Pct)     Histogram
ec2.internal |456 (46.77%) +++++++++++++++++++++++++++++++++++++++++++++++++++++
uchicago.edu |422 (43.28%) +++++++++++++++++++++++++++++++++++++++++++++++++
local        |28 (2.87%)   ++++
t2.ucsd      |23 (2.36%)   +++
phys.uconn   |12 (1.23%)   ++
tusker.hcc   |10 (1.03%)   ++
...
The distribution program reduces a list of hostnames to a set of hostnames with no duplication (much like sort | uniq -c), but
additionally plots a distribution histogram on your terminal window. This is nice for seeing how Condor selected your execution endpoints.
Stop an Annex
The following command shuts HTCondor off on each instance in the annex; if you're using the default annex image, doing so causes each instance to shut itself down.
$ condor_off -annex MyFirstAnnex$USER
Sent "Kill-Daemon" command for "master" to master ip-172-31-48-84.ec2.internal
Spot Fleet
condor_annex supports Spot instances via an AWS technology called
Spot Fleet. Normally, when you request instances, you request a specific
type of instance (the default on-demand instance is, for instance,
m4.large.) However, in many cases, you don't care too much about
how many cores an intance has - HTCondor will automatically advertise
the right number and schedule jobs appropriately, so why would you?
In such cases - or in other cases where your jobs will run acceptably
on more than one type of instance - you can make a Spot Fleet request
which says something like "give me a thousand cores as cheaply as
possible", and specify that an m4.large instance has two cores, while
m4.xlarge has four, and so on. AWS will then divide the current price
for each instance type by its core count and request spot instances at
the cheapest per-core rate until the number of cores (not the number of
instances!) has reached a thousand, or that instance type is exhausted,
at which point it will request the next-cheapest instance type.
In order to create an annex via a Spot Fleet, you'll need a file containing a JSON blob which describes the Spot Fleet request you'd like to make. (It's too complicated for a reasonable command-line interface.) The AWS web console can be used to create such a file; the button to download that file is (currently) in the upper-right corner of the last page before you submit the Spot Fleet request; it is labeled `JSON config'. You may need to create an IAM role the first time you make a Spot Fleet request; please do so before running condor_annex.
Additionally, be aware that condor_annex uses the Spot Fleet API in its
request mode, which means that an annex created with Spot Fleet has
the same semantics with respect to replacement as it would otherwise: if
an instance terminates for any reason, including AWS taking it away to
give to someone else, it is not replaced.
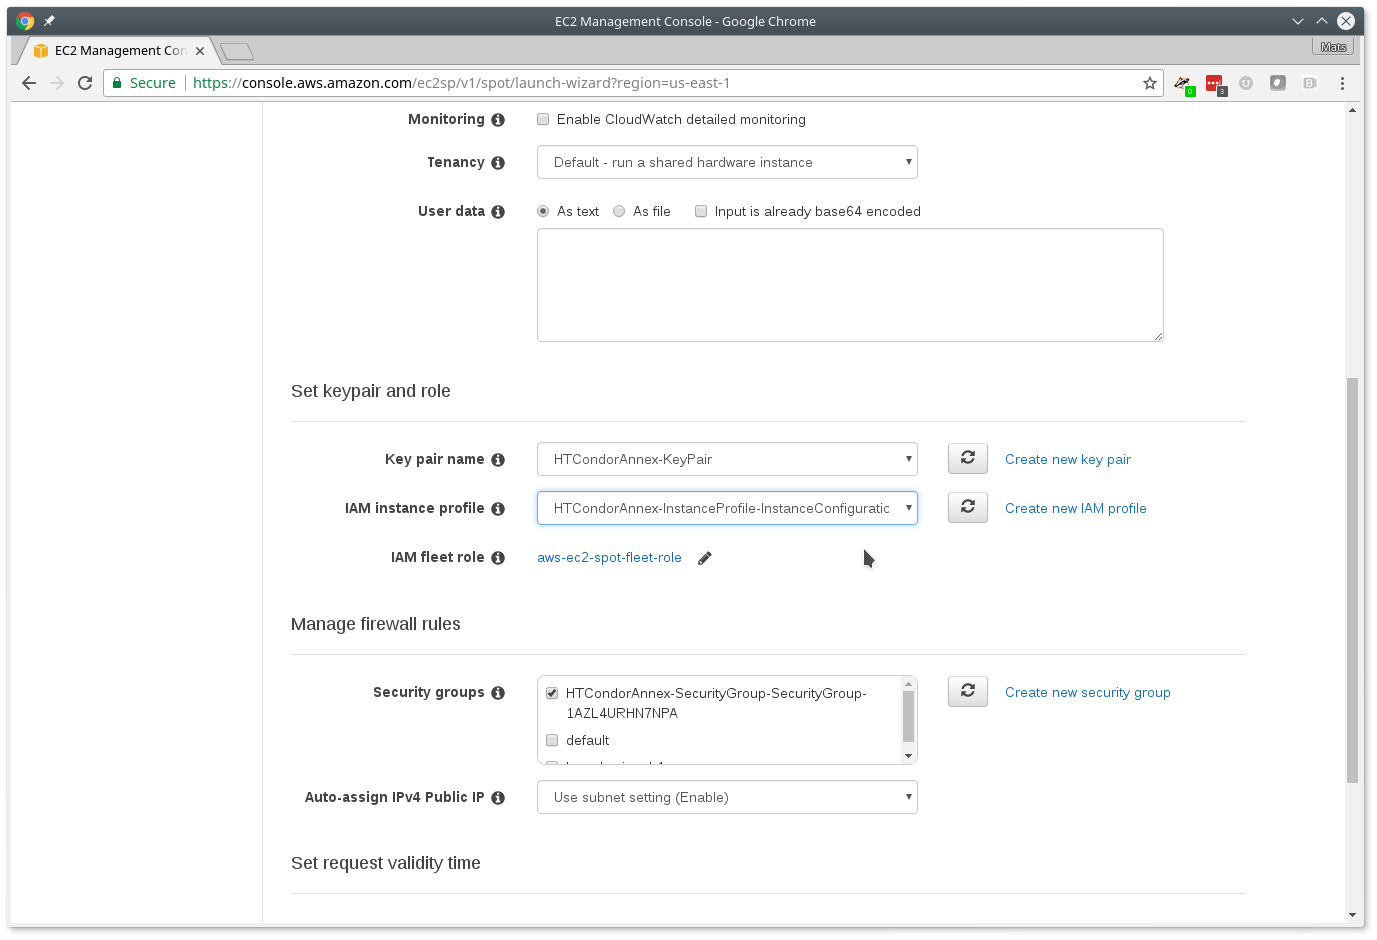
You must select the instance role profile used by your on-demand instances for condor_annex to work. This value will be stored in the configuration macro ANNEX_DEFAULT_ODI_INSTANCE_PROFILE_ARN by the setup procedure.
$ grep ANNEX_DEFAULT_ODI_INSTANCE_PROFILE_ARN ~/.condor/user_config
ANNEX_DEFAULT_ODI_INSTANCE_PROFILE_ARN = arn:aws:iam:...
Go to AWS Request Spot Instances
to get started. Click Request Spot Instances.
Set target capacity to 5, and use ami-a2a795b4 for the image.
Select instance types: c3.large and m4.xlarge
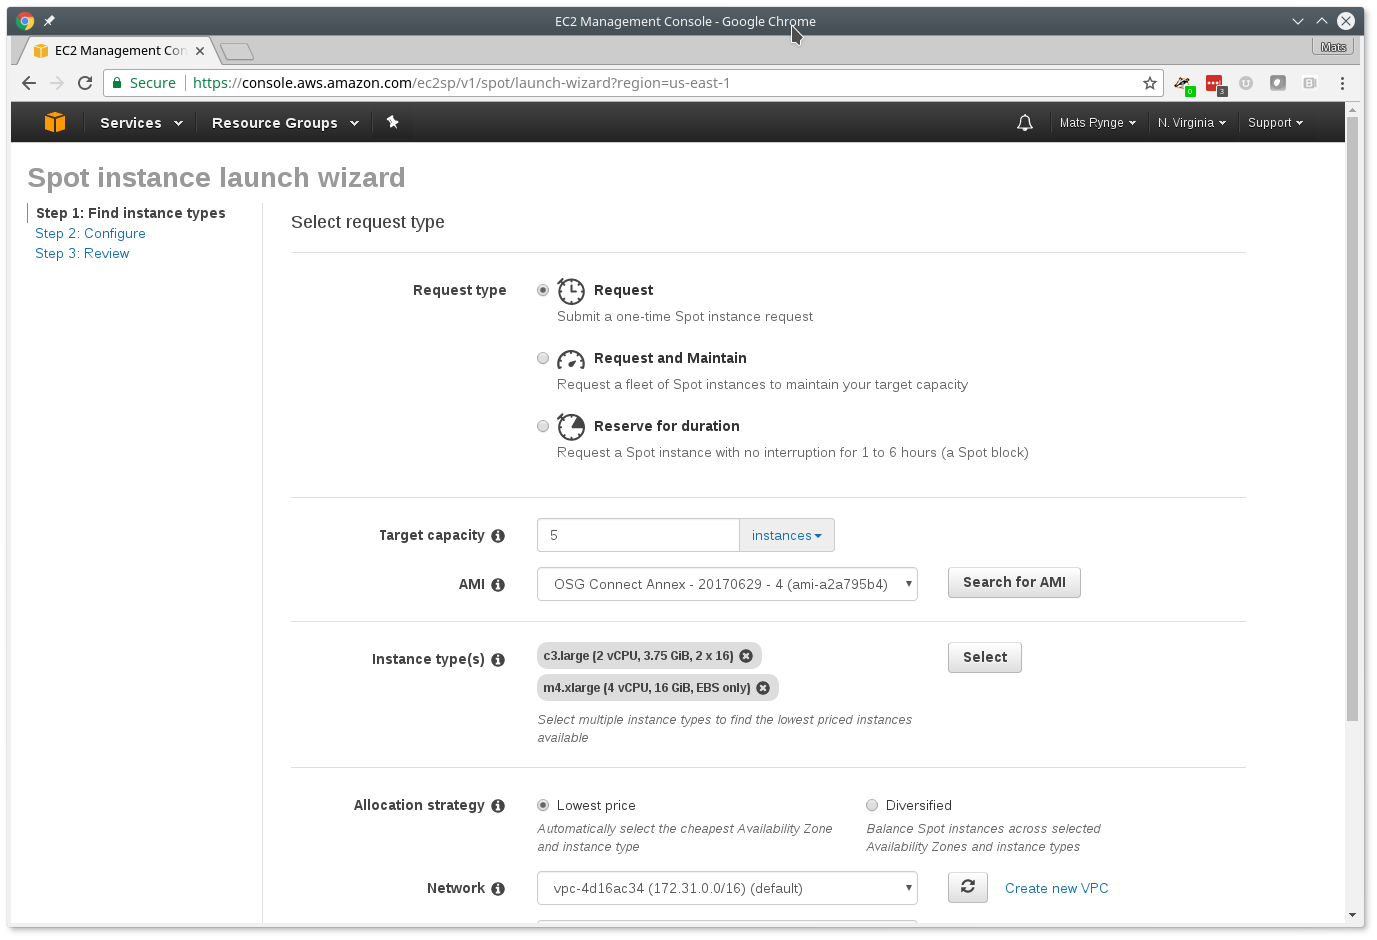
Make sure you select the correct instance role in the dropdown.
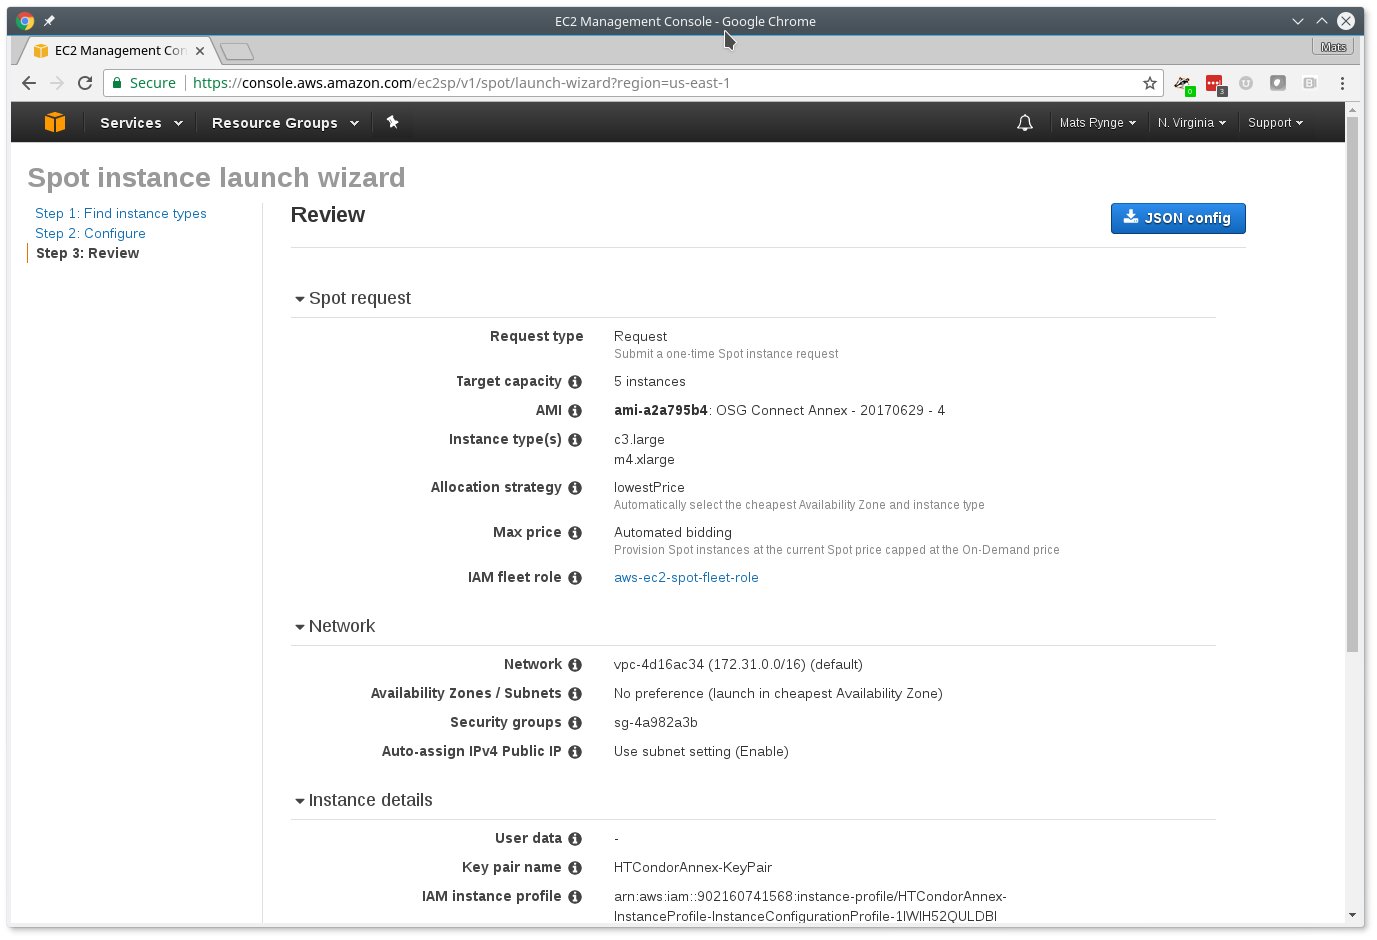
Download the JSON file from the upper right corner. Do not finish the guide.
Copy the json file to ~/.condor/fleet.json under your account on training.osgconnect.net.
$ connect_annex -annex-name SpotAnnex$USER \
                -slots 5 \
                -aws-spot-fleet-config-file ~/.condor/fleet.json
Will request 5 spot slots for 0.83 hours.  Each instance will terminate after being idle for 0.25 hours.
Is that OK?  (Type 'yes' or 'no'): yes
Starting annex...
Annex started. It will take about six minutes for the new machines to join the pool.
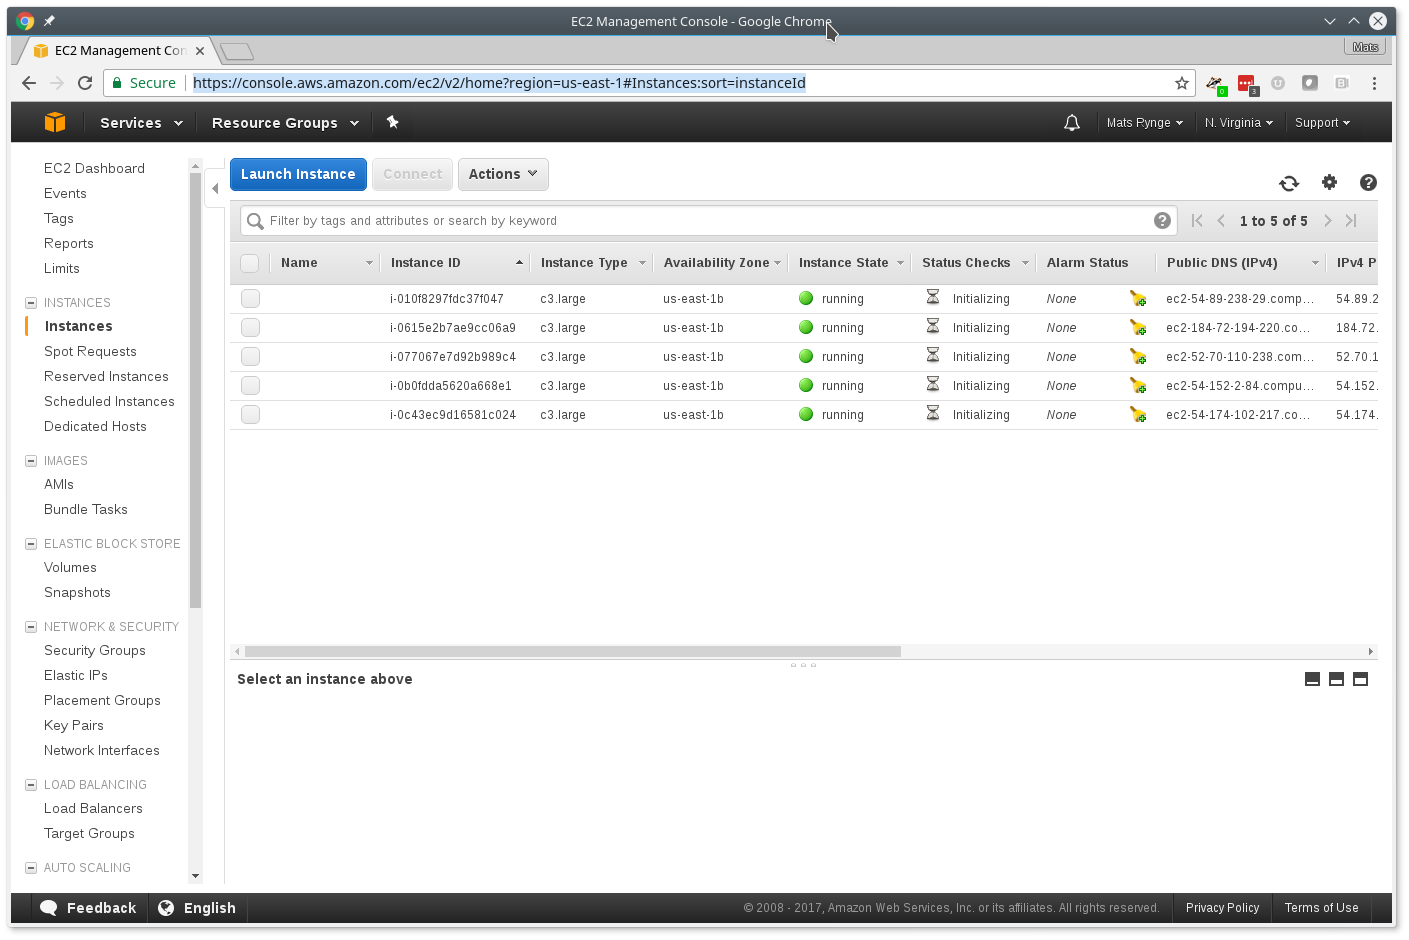
If you go back to your AWS EC2 Instances console you will find the spot instances starting up.
As in the on-demand case, we can check on the instances with condor_status -annex
$ condor_status -annex SpotAnnex$USER
Name                                OpSys      Arch   State     Activity LoadAv Mem   ActvtyTime

slot1@ip-172-31-80-9.ec2.internal   LINUX      X86_64 Unclaimed Idle      0.000 1820  0+00:00:23
slot2@ip-172-31-80-9.ec2.internal   LINUX      X86_64 Unclaimed Idle      0.000 1820  0+00:00:30
slot1@ip-172-31-82-119.ec2.internal LINUX      X86_64 Unclaimed Idle      0.000 1820  0+00:00:16
slot2@ip-172-31-82-119.ec2.internal LINUX      X86_64 Unclaimed Idle      0.000 1820  0+00:00:22
slot1@ip-172-31-86-220.ec2.internal LINUX      X86_64 Unclaimed Idle      0.000 1820  0+00:00:23
slot2@ip-172-31-86-220.ec2.internal LINUX      X86_64 Unclaimed Idle      0.000 1820  0+00:00:29

                     Machines Owner Claimed Unclaimed Matched Preempting  Drain

        X86_64/LINUX        6    0       0         6       0          0      0

               Total        6    0       0         6       0          0      0